Recently I wanted to know how to make stars in Photoshop. Sure I know a bit about Photoshop but was just interested to see different methods. I went to YouTube and watched a few videos. The one which really jumped out at me was adding stars to a night sky by Steve Patterson from PhotoshopEssentials. Very impressed with the technique, I wanted to try it out and pass on the method.
So here goes…We will be making stars in Photoshop and adding them to this image. As always there is a video below so that you can see the process in real time.
Step 1 – Select the image you want to add stars to
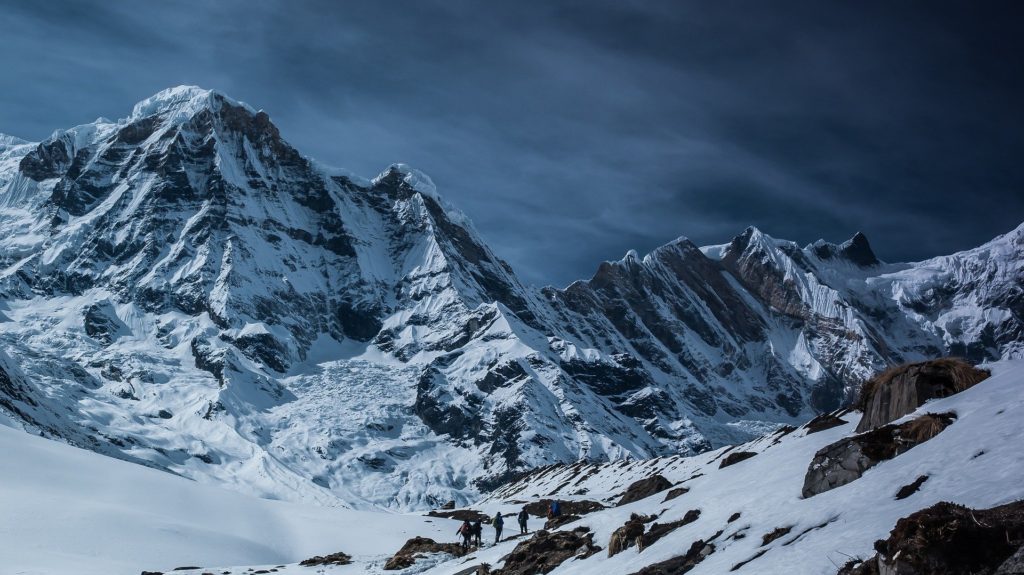
The first we will need is a reference image to add stars to. I have chosen a pretty straight forward example. We will make stars in Photoshop and add them to this snowy mountain scene
To summarize this method of making stars we will:
- Create a black layer
- Add monochromatic noise to the layer
- Adjust the levels of the layer to hide some of the noise which will give us the effect of a star filled night
- Add some glow
- Add some color
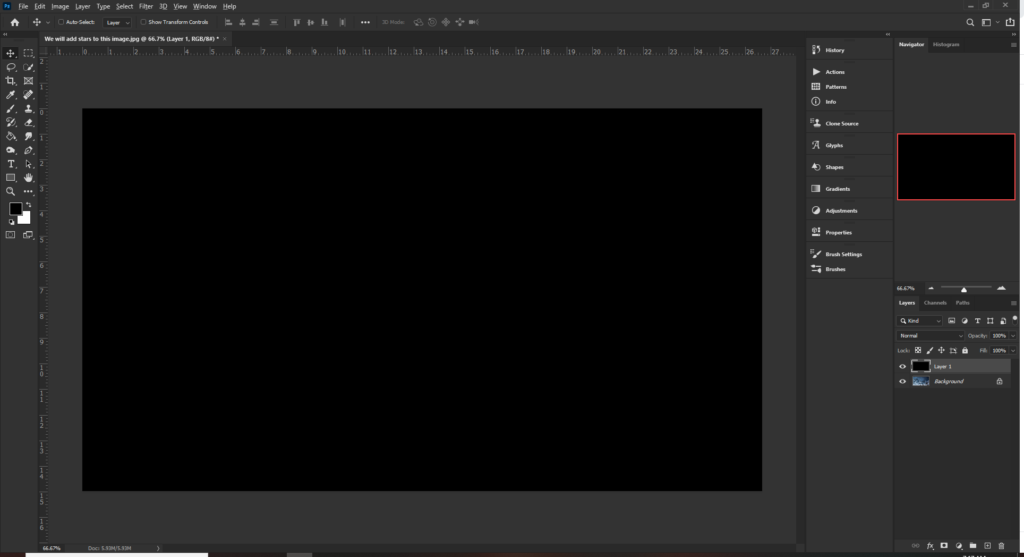
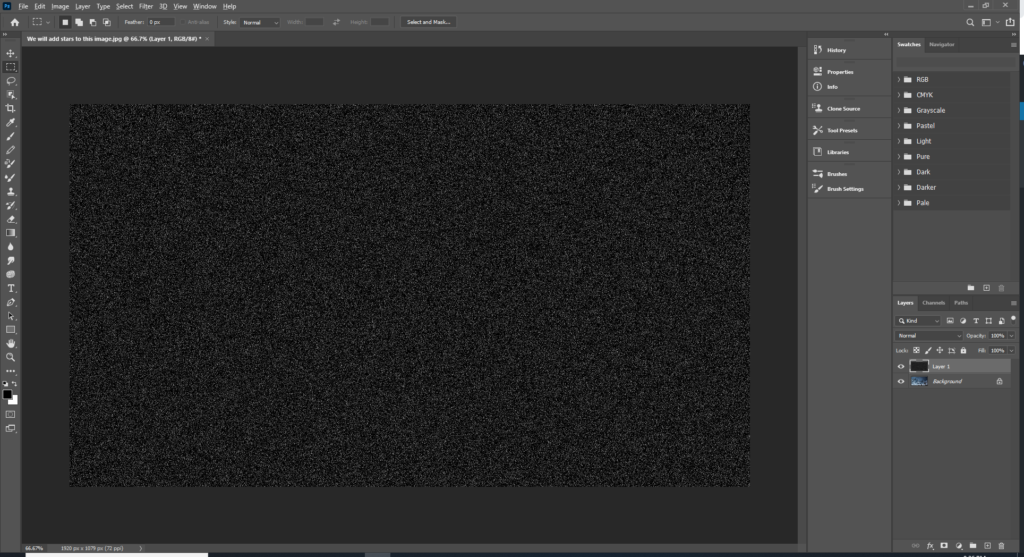
So with that being said, we will now create our black layer and place it above our mountain scene. Do not worry about layer placement at this stage. It will all come together at the end with layer effects
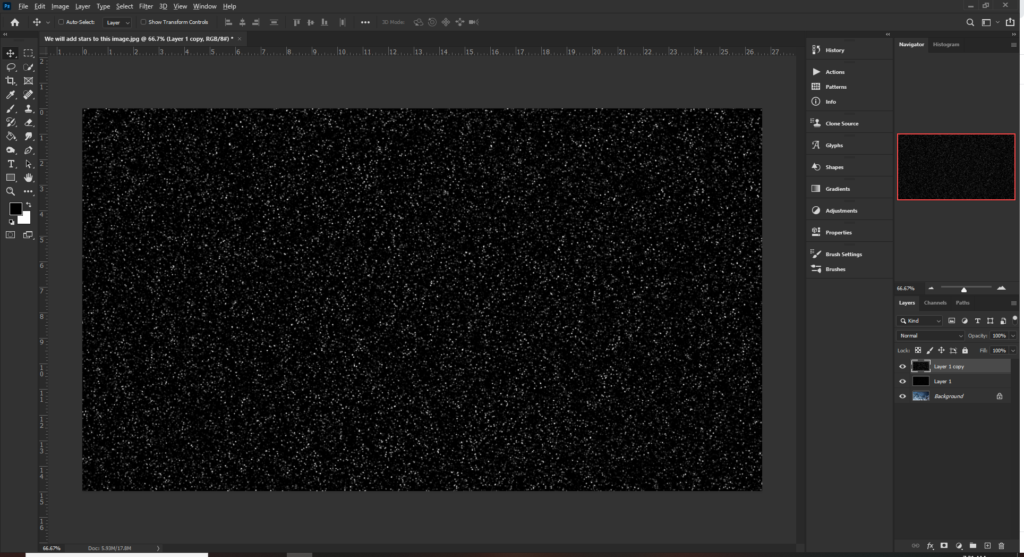
Add noise to the layer by selecting Filter > Noise > Add Noise
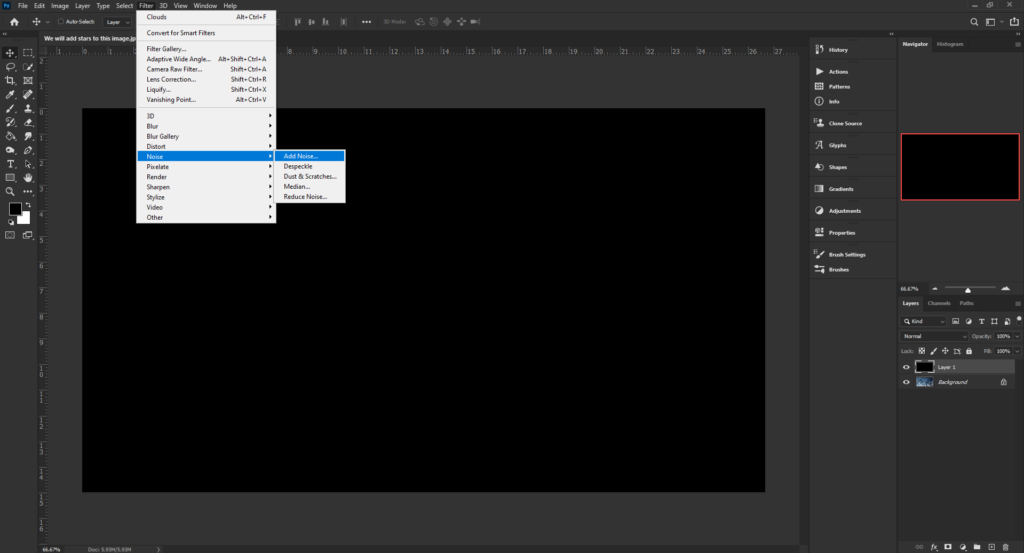
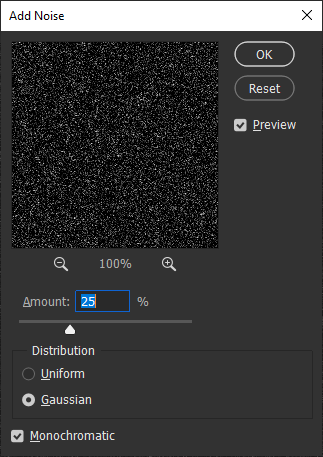
For this image I added 25% noise but it really depends on the resolution of your image. Make sure that the following settings are configured:
- Amount: 25%
- Gaussian: Checked
- Monochromatic: Checked
We now have a black layer filled with noise
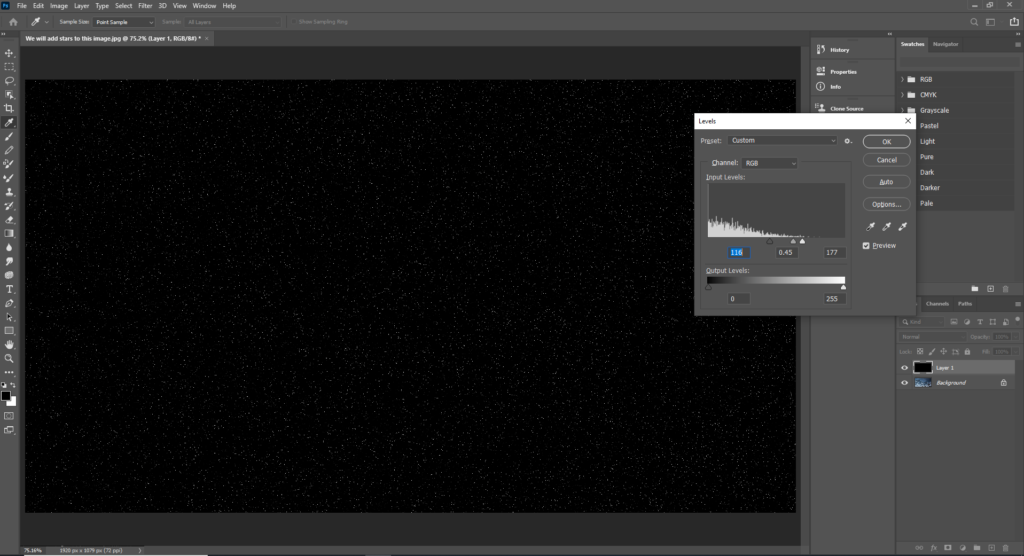
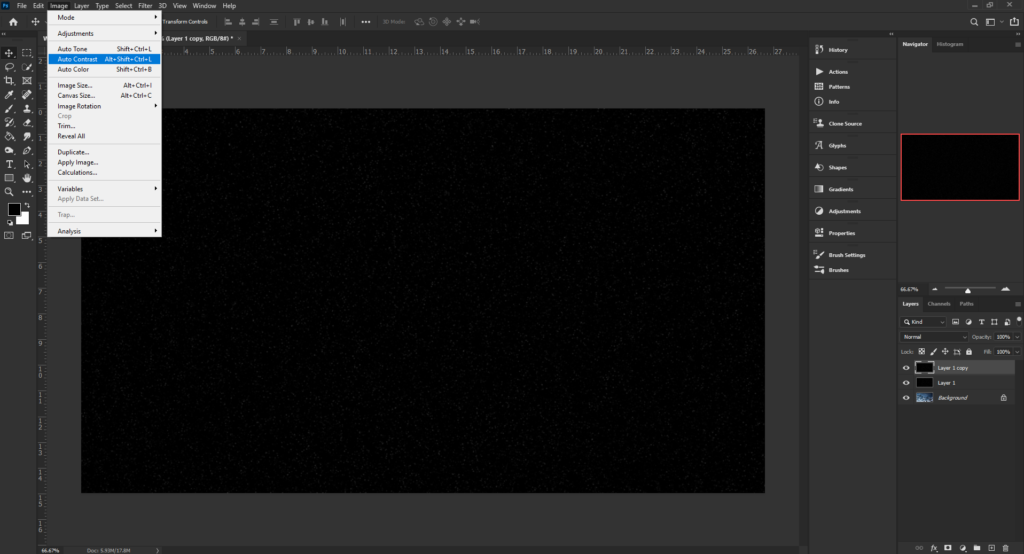
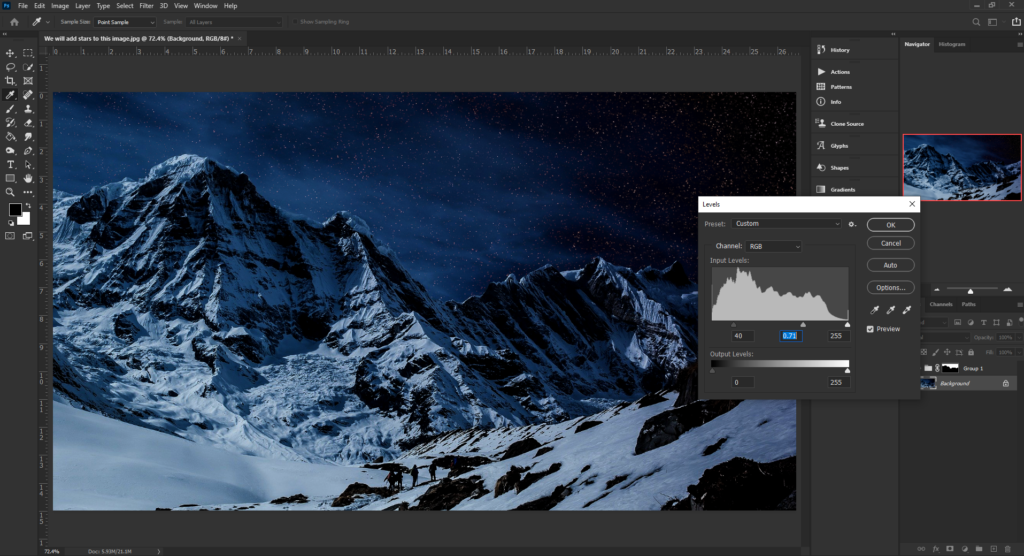
Next we will start to see this technique take shape. We adjust the levels (Ctrl+L) of the black noise layer. Bring the slider in from the right to lighten the image and the slider in from the left to darken the image. This combination will start to hide some of the noise. We can now see how to make stars in Photoshop using this very cool technique
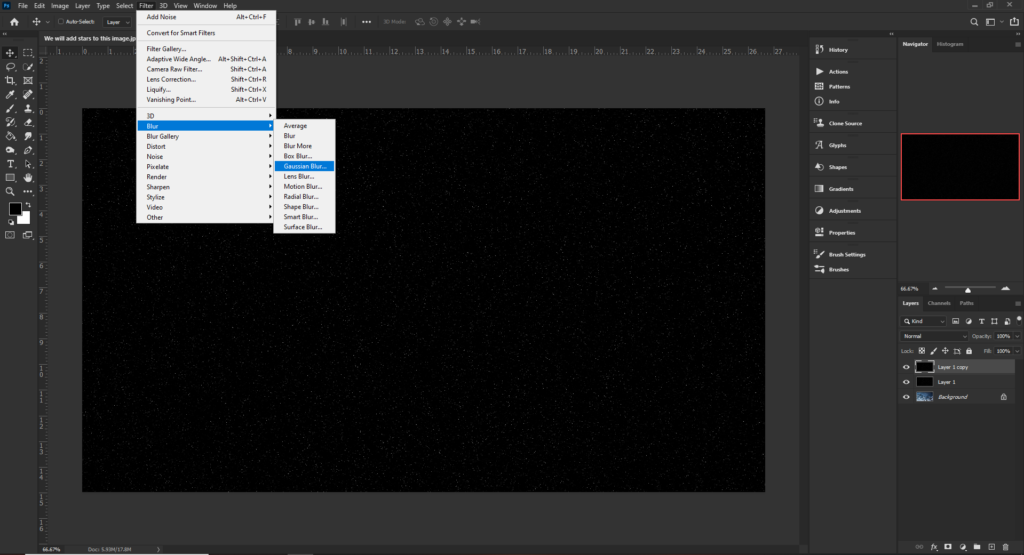
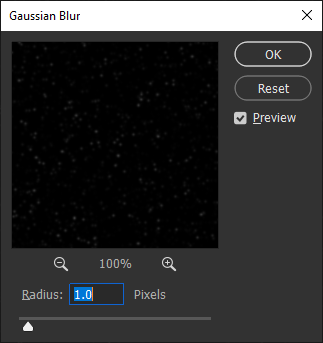
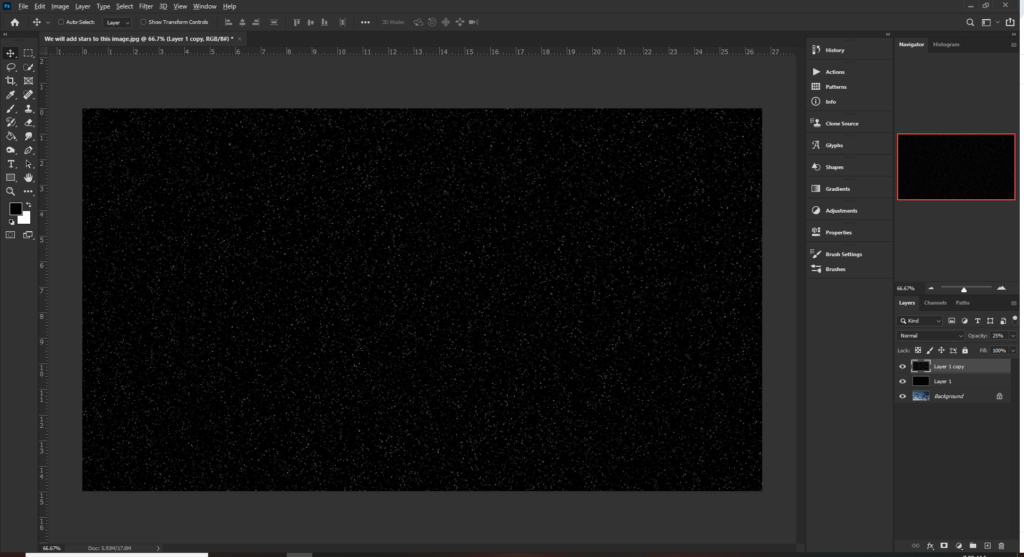
The next step will give a nice glow to the stars. Duplicate the stars layer and add a Gaussian blur
Select Image > Auto Contrast to make the stars really glow
This effect is a little strong so you may want to reduce the opacity of the glow layer to about 20%
The glow layer really adds to the effect and if you toggle (turn on & off) the glow layer you will see this clearly
This next part is very cool. By adding a Hue & Saturation layer we can colorize the stars. I have given the stars a nice blue effect
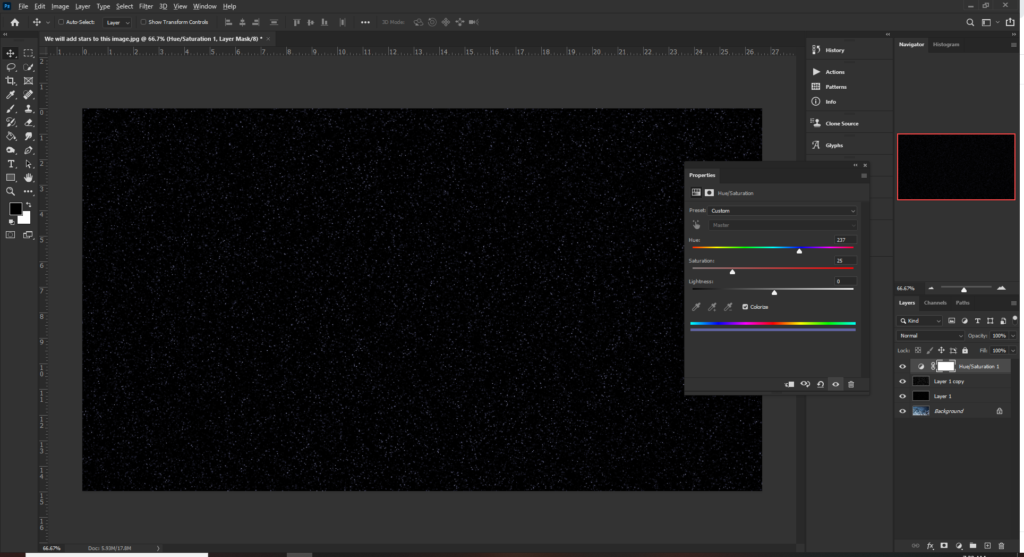
Add another Hue & Saturation layer and colorize with an orange color. Orange is the opposite of blue so this will create most contrast.
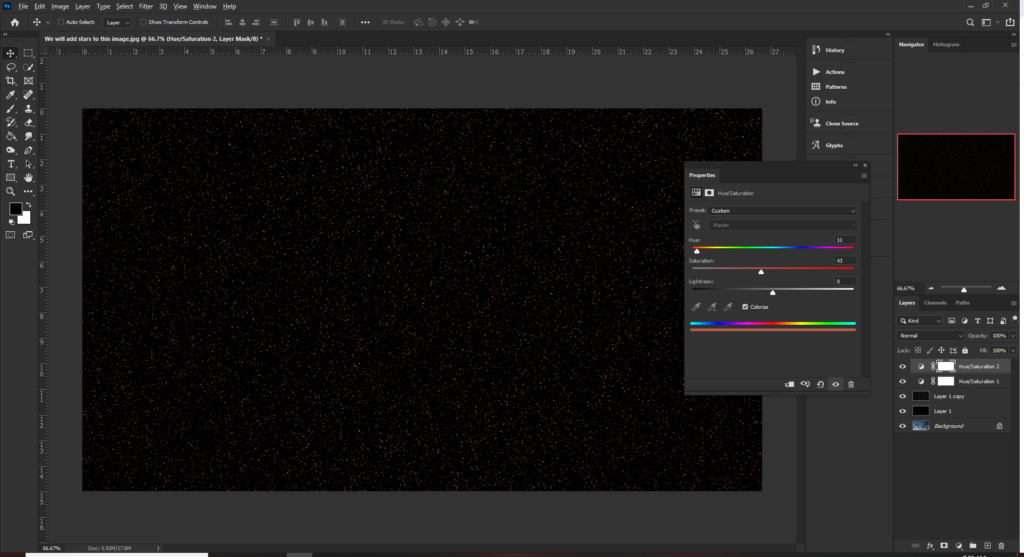
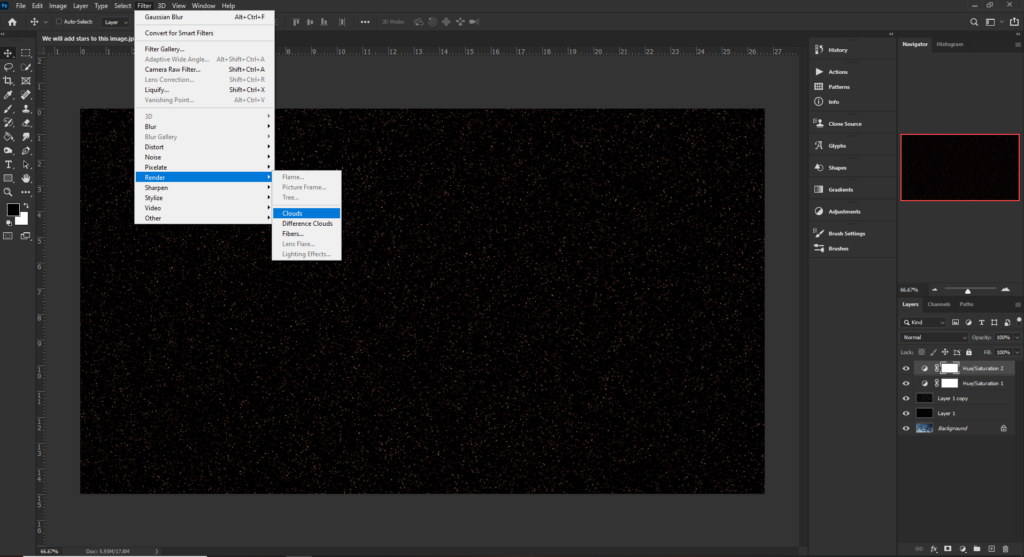
If you are thinking that this is a bit weird…we just covered up our blue layer with the orange layer. We did yes but using layer masks we can hide parts of the orange layer and let the blue shine through. With the layer mask selected on the top Hue & Saturation layer we can add a cloud effect to the mask.
Remember that layer masks are a way to hide parts of a particular layer. If you paint black on the layer mask, it will hide the contents of the layer. White will reveal contents. So using the clouds method is a very cool technique which will randomize which parts of the blue and orange layers are visible. Select Filter > Render > Clouds (make sure you are on the mask)
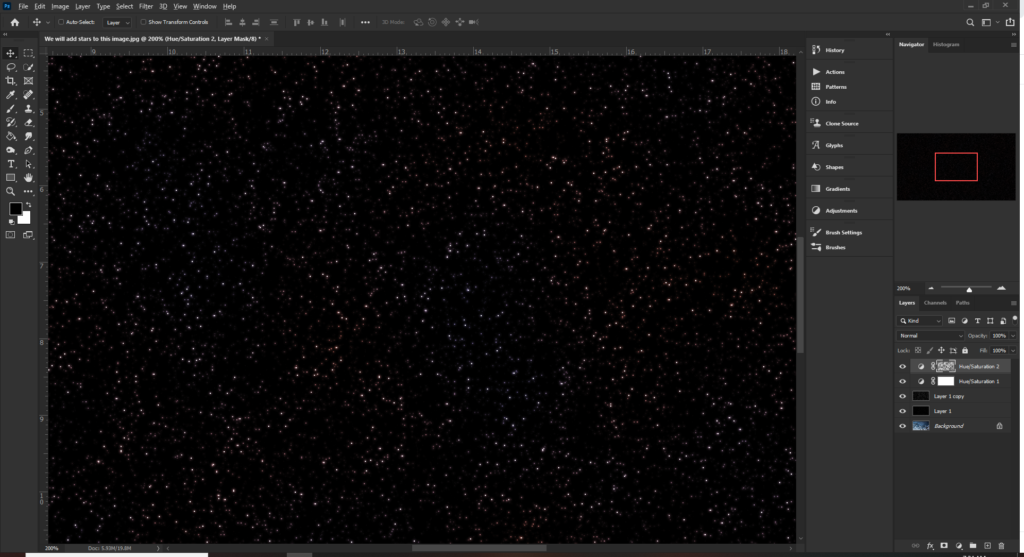
Below is a close up to show the blue and orange stars showing through
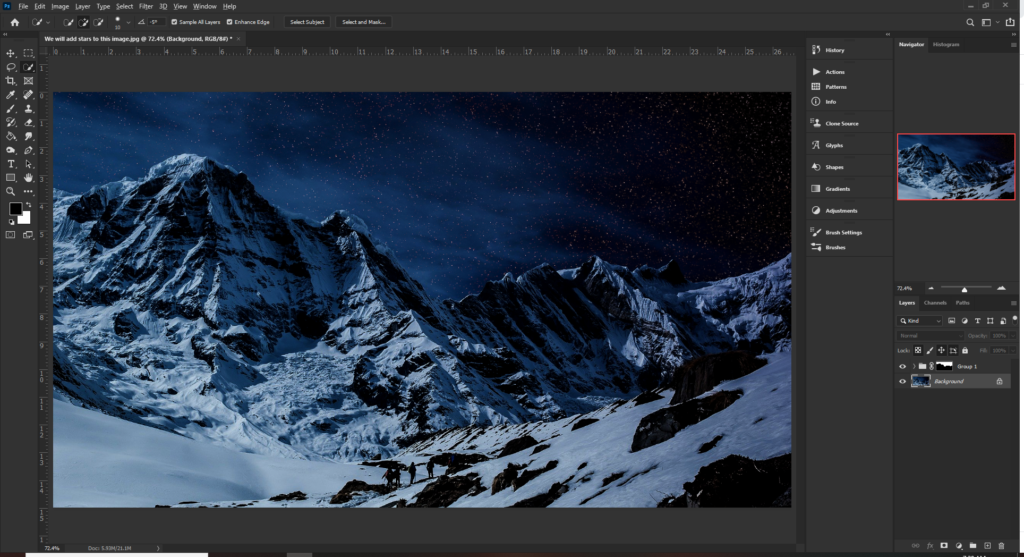
We are down with the stars now, so we can group the star layers together and set the blend mode to Lighten (Remember to check out the video if you are stuck here). The lighten blend mode will do exactly what it says and hide the darkest parts of the image and allow the stars to shine through

We have still got some stars showing on the mountain range so we will need to clear that up. You can use your favorite selection tool (pen, magic wand, lasso) I quite like use the select subject tool for task like this Select > Subject and then using the magic wand to clean things up

With the mountains selected we can select the stars group and apply a layer mask. Remember that black will hide the contents so you will need to make sure that the sky is white on the layer mask. Either hold Alt and click the layer mask icon or create a regular mask and invert it (Ctrl+I)
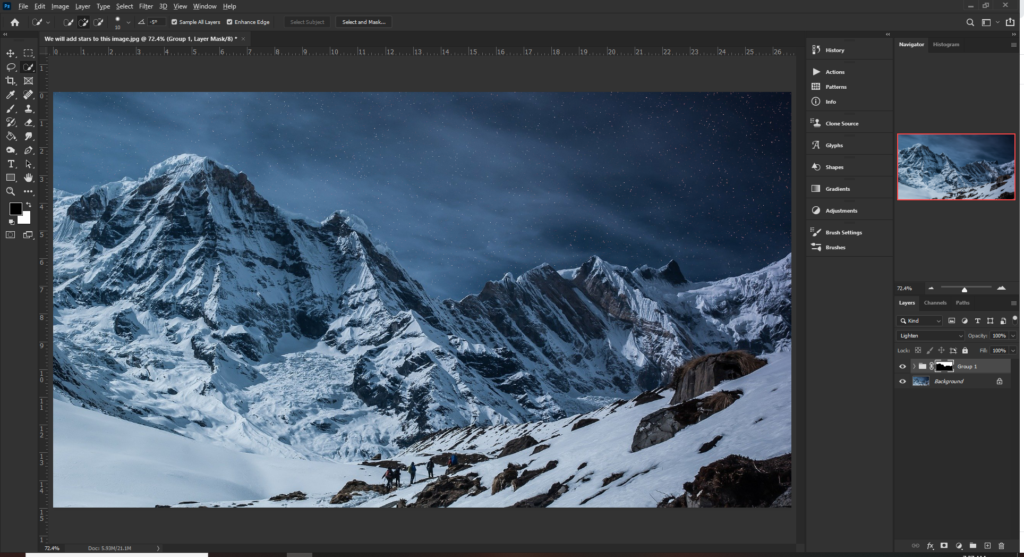
We are almost there now but it feels like the whole scene needs to be darker. This will give a more realistic view of a night scene. After all, if you can see stars it must be night time. Press Ctl+L to adjust the levels of the mountain scene. ring the slider in from the left to make it darker. This looks much better and you can now see the stars clearer
We are now complete
So there we have it, we now know how to make stars in Photoshop. I hope you found this tutorial useful. I personally found this method of making stars very cool and added another technique to my Photoshop toolbox.
Now go create something